CloudCADI End-to-End Automation
CloudCADI End-to-End Automation helps you efficiently clean orphan resources, create ECR lifecycle policies, and start or stop EC2 instances in your AWS console with a single click.
To use this automation, download the script and follow the steps.
Note
- The script includes functions for cleaning orphan resources, creating ECR lifecycle policies, and starting or stopping EC2 instances.
5.1 CloudFormation
Note
- The user must create the CloudFormation stack in the same region where CloudCADI is deployed.
- If you are using the same AWS account where CloudCADI is running, log in to that account and follow the steps below.
- If you are using a different account, log in to the cross-account and follow the steps below.
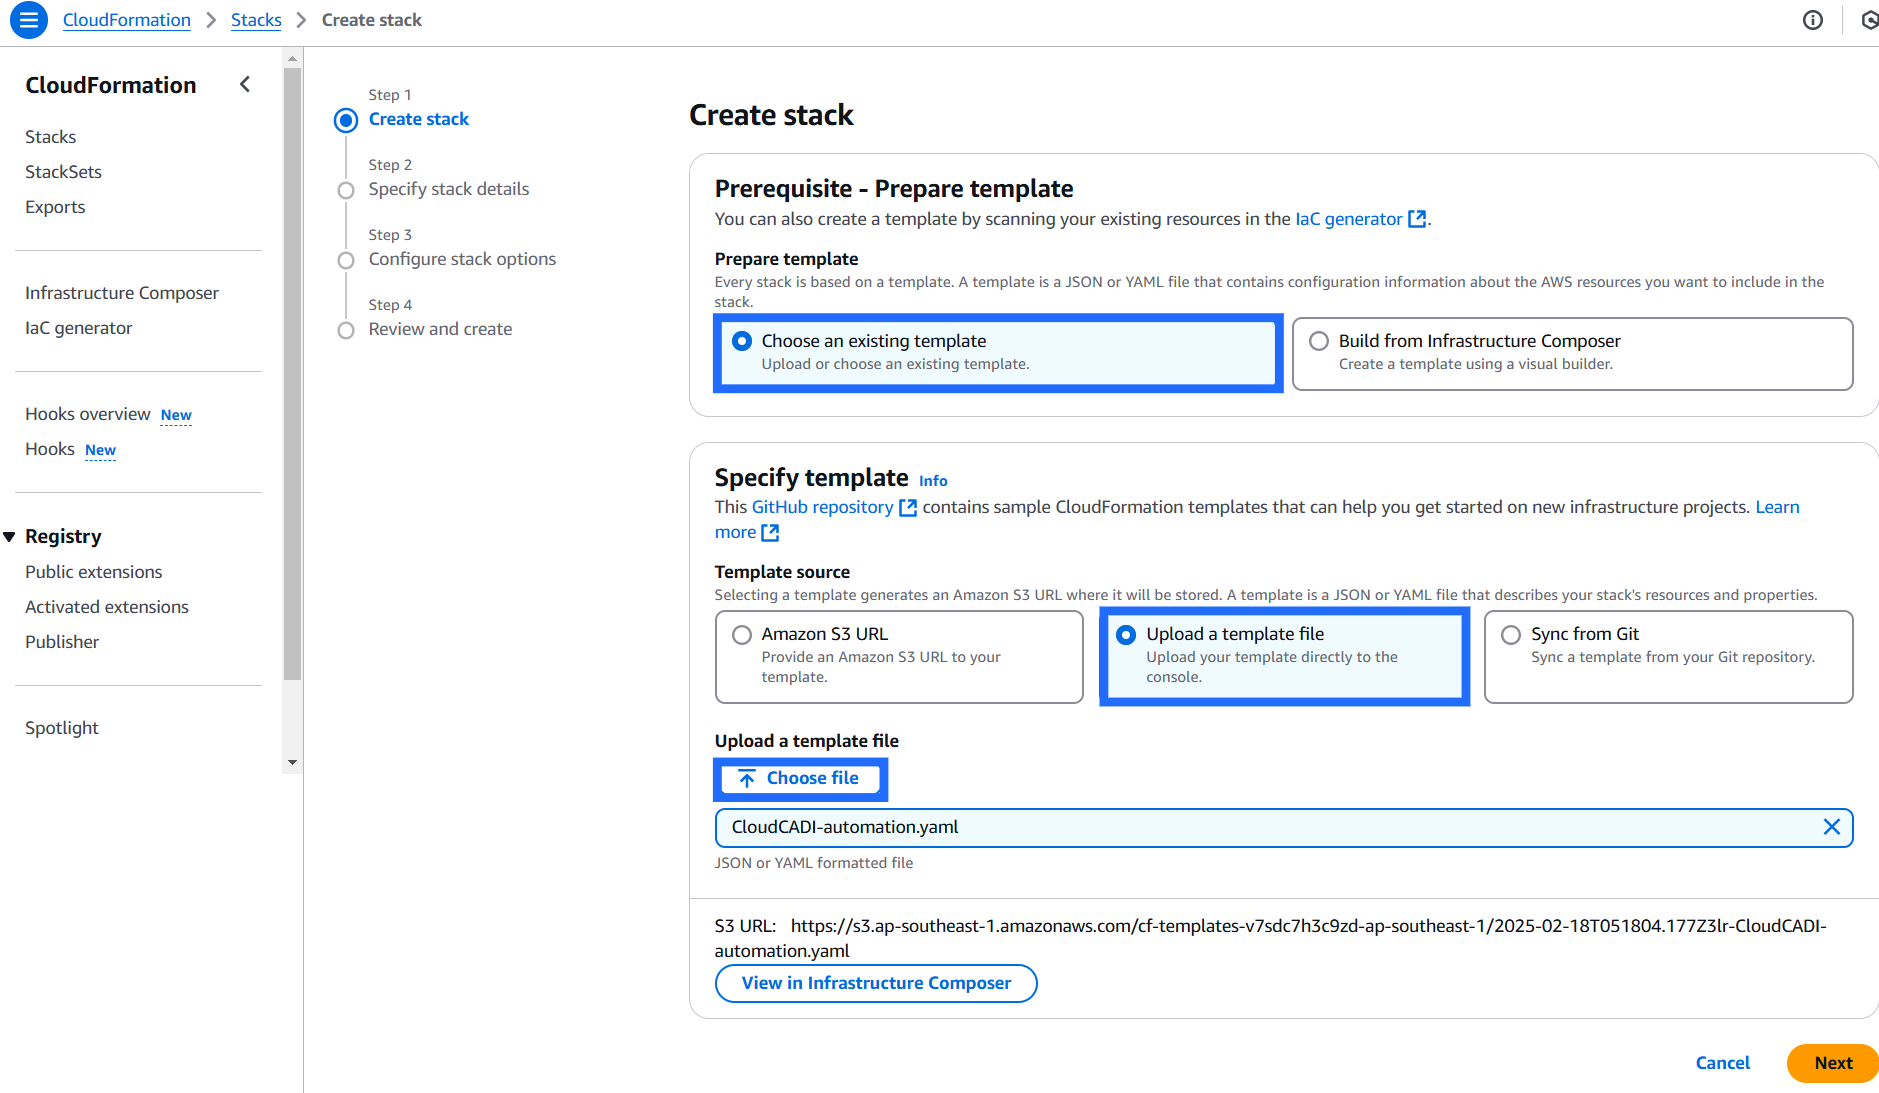
- Go to AWS CloudFormation console -> Create stack -> With new resources (standard).
Create stack
- Prepare template: Choose an existing template.
- Template Source: Upload a template file (Downloaded file).
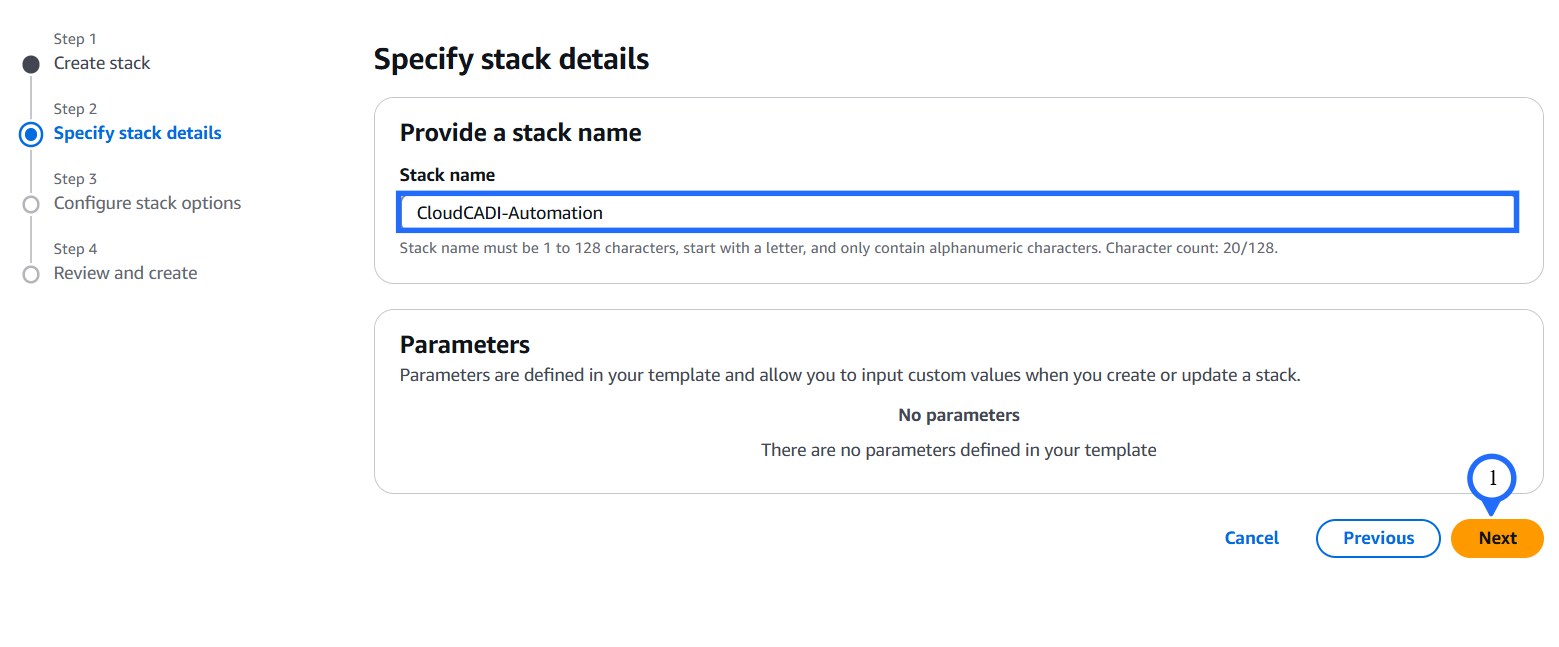
Specify stack details
- Provide a Stack name and click on Next.
Configure stack options
- Add tags and click Next.
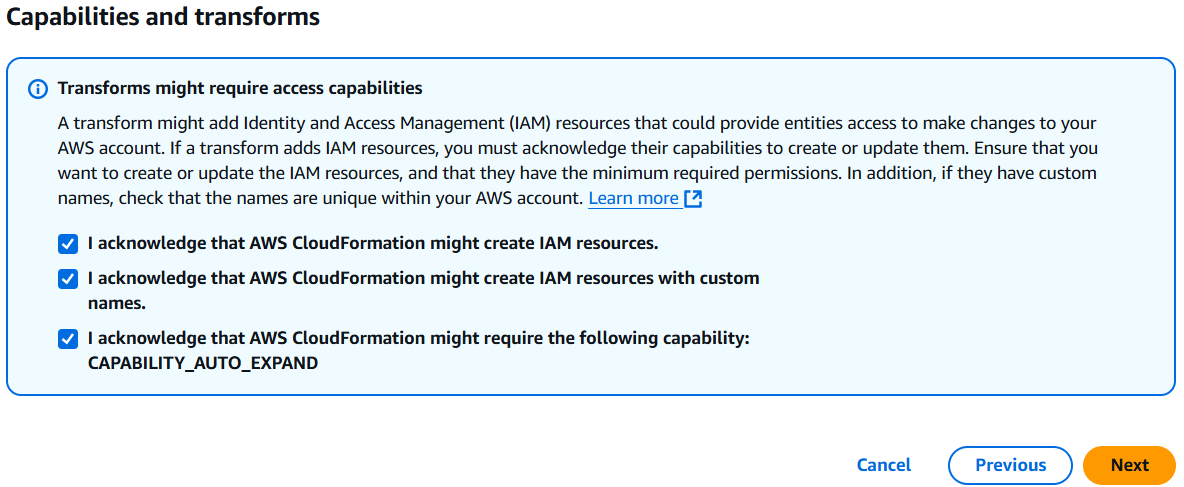
- Check options in below and click Next.
-
Review and click Submit.
-
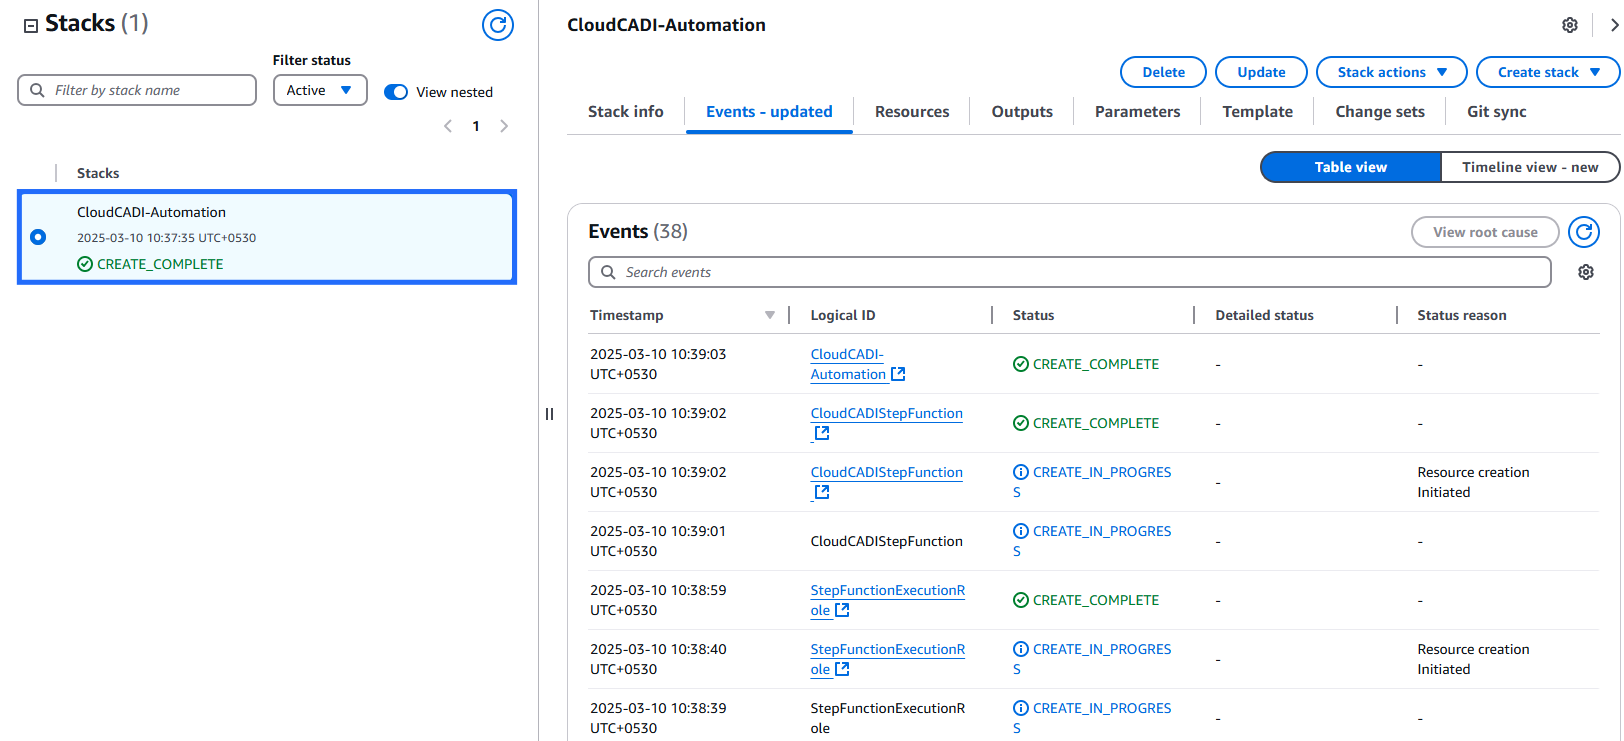
It'll take up to 5 minutes to finish the resource creation.
- Once the stack has been created successfully, go to the Outputs tab. Copy the role ARN
5.2 CloudCADI Setup
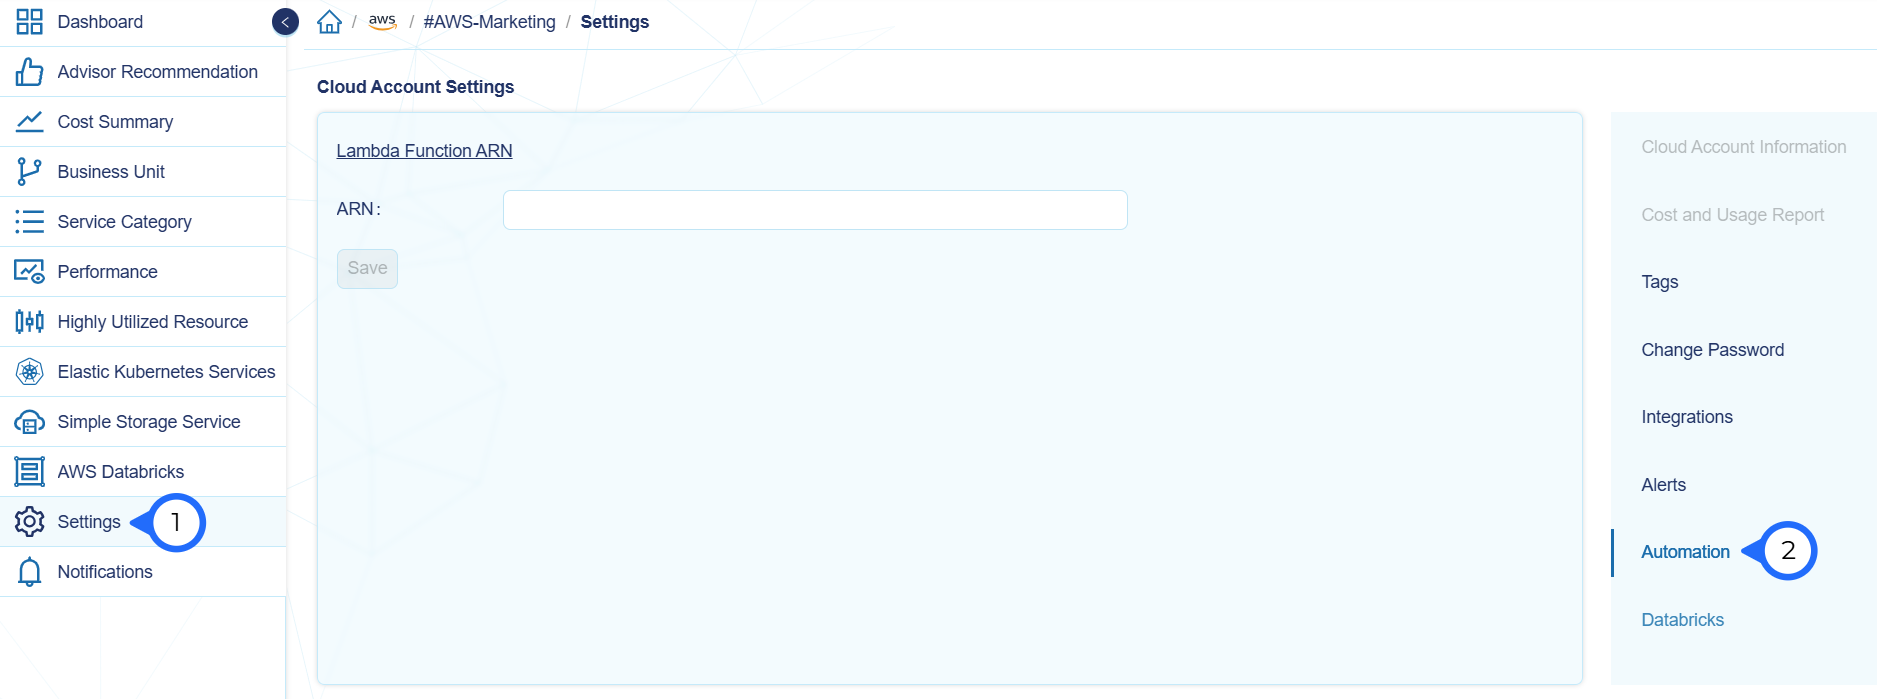
- In CloudCADI click Settings tab, then select the Automation tab on the right side.
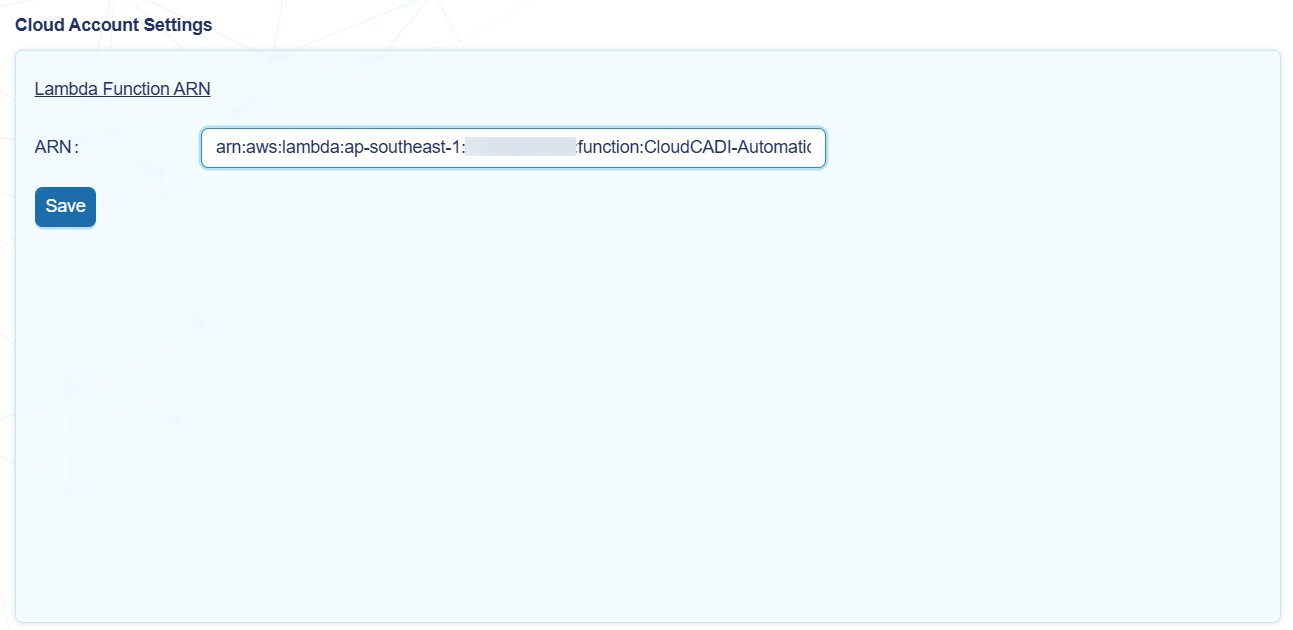
- Paste the ARN.
- Now you can delete orphan resources in the AWS console from the CloudCADI.
Note
- The cleanup request is sent to the admin's email with the resource ID and its region.
- The admin can either approve or reject the request within 12 hours.

